Showing posts with label DIY projects. Show all posts

Tuesday, November 11, 2014

Letter of the Week Activities with the Letter B

It has been a B as in beautiful week with the letter B for me and my sons last week!
 
Let me share with you the activities that we had.
 
1. Finger-painting of letter O by Mateo - We always kick off our Letter of the Week Activity with finger-painting by my 2-year-old son. It's very simple but effective, relaxing and therapeutic.


2. Painting the Life Cycle of the Butterfly - I already had this idea right after we bought a copy of the book The Very Hungry Caterpillar. But I had to postpone it for some time when I have decided to do Letter of the Week activities with my sons. Having the letter B as our Letter of the Week was just the perfect time for it.

This was made by Mateo.


Here's how we did it step-by-step:
     a. I folded a bond paper into 4 parts/quadrants. Each child was given his own bond paper.
 
     b. I painted my son's hand with green paint using a brush.
 
     c. Then, I helped my son press his hand on the first quadrant of the bond paper.
 
     d. Next, I helped/guided my son as he dipped one finger on green paint again and made a series of dots that are joined to each other like a caterpillar.
 
     e. After finishing the body of the caterpillar, I helped/guided my son in dipping another finger in red paint and in making a head for the caterpillar.
 
     f. While waiting for the leaf (hand print) and the caterpillar to dry, I helped/guided my son again in painting a cocoon using his fingers. I helped/guided him in dipping his finger on brown paint and pressing it on the bond paper to form the pattern of a cocoon.
 
     g. We cleaned his hand/fingers first before painting them with his chosen color for the wings of the butterfly. I used a paint brush to paint my sons' palms.
 
      h. Then, I helped each child press his palm gently on the last quadrant. You can use both hands/palms to stamp hand prints for the wings or you can just use the same hand to do that. If you use the same hand though, you need to coat the same palm with paint again before pressing it the second time. 
 
       i. I waited for the paint to dry to add details to the caterpillar, an egg on the leaf hand print and additional colors and the body and details on the butterfly.
 
       j. Once dry, I helped/guided my son as he dipped his finger on white paint and pressed it on the green leaf.
 
       k. I assisted my son in drawing the eyes, smile and antennae on the caterpillar.
 
       l. I helped/assisted my son in finger-painting the body of the caterpillar and eventually finger painting and drawing the additional details.
 
This was made by Yanthy.

Note: My eldest son worked independently on this art activity. He would simply watch what I was doing with his younger brother whose hand I am holding/guiding most of the time. I asked him to imitate what I was doing and I would just intervene if necessary. ;)
 
I explained our art activity briefly, relating it to the story in our book. We capped our painting activity by singing the butterfly song that we learned from one of our helpers. It's actually spelling out the word BUTTERFLY. :)
 
3. Making a Bulldozer Toy Out of Paper Cut-out - I recently found and bought a book from the Book Sale that's about Diggers. It's an activity book about construction toys and areas. I was delighted when I saw it because I know that my sons would like it. In one of its pages, there's a bulldozer toy that can be cut-out and formed. I proceeded to cut the parts of the toy after we finished our painting activity on the life cycle of a butterfly. The boys were very happy to play with the paper bulldozer as soon as I finished it. 


4. Reading books about Things that Start with the Letter B - Aside from reading the book The Very Hungry Caterpillar, we read books about bulldozers, buses, bees and stories from the Bible. As usual, we used props (their toys) as we read the books.


5. Serving and Eating Food that Start with the Letter B - Some of the food that we had starting with the letter B last week were the following: banana with peanut butter wrapped in tortilla, beef balls, eggnog biscuits which my sons imagined to be hosts (Body of Christ during their pretend play of the Holy Mass), and bangus or milkfish sinigang.


6. Bible Verse Writing Activity - This is part of our Catholic ABC Program. Aside from the art and reading activities that we have each week, I make sure that I introduce a Bible verse to my sons, particularly to my eldest son. I use this activity as an opportunity to practice my eldest son's listening, writing and spelling skills. Last week, our Bible verse was taken from John 6:51.


7. Playing with Toys that Start with the Letter B and Pretend Play - The boys played again with their construction toys that start with the letter B (bulldozer, backhoe, bike). After tracing his finger on the letter B puzzle mat, I removed the letter B and filled it with my son's building blocks. Both of my sons love playing with building blocks! They can play with these toys for hours, imagining scenarios and creating them using the building blocks. They also played bowling , basketball and my younger son played with his smaller balls.


Aside from their favorite pretend play with building blocks (wherein they pretend to have a parking lot/building), they also pretended to celebrate the Holy Mass. My eldest son pretended to be the priest most of the time, doubling as musician/pianist and choir sometimes. My younger son pretended to be a reader (lector/commentator), parishioner or Mass-goer, choir member and sometimes priest also. He enjoyed pretending to receive Holy Communion (he liked the eggnogs!).
 
My eldest son pretending to be a priest giving Holy Communion to our helper.
My toddler pretending to carry the Bible
during the entrance procession at the start of the Mass.
 
8. B as in Bethlehem Craft - This craft activity is in line with our Bible verse for the week as well. I learned while I was researching for the most appropriate verse for our letter of the week that Bethlehem means house of bread. That discovery affirmed my plans to make our DIY Bethlehem/Nativity décor. I recommend that you read this interesting article about Jesus as the Living Bread that came down from heaven and how perfect that He was born in Bethlehem.
 
I did the same DIY Bethlehem décor/craft using popsicle sticks with my toddler which I did with my eldest son last year.
 

Let me share the steps as well for this craft:
 
     a. I simply asked my son to paint 6 popsicle sticks with green paint.
 
     b. Then, I asked him to paint 1 popsicle stick with white paint, guiding him to leave a space for the face of Baby Jesus.
 
     c. We set aside these popsicle sticks to air-dry.
 
    d. I then painted cream colored paint to serve as faces to the yellow and blue popsicle sticks as well as the white popsicle stick. I let these air-dry once more.
 
     e. While letting them dry, I drew and cut out a star from a scrap of bond paper.
 
     f. I asked my toddler to squeeze silver glitter glue all over it. Then, we let it dry once more.
 
    g. When all the popsicle sticks were dry, I glued them to form a stable and inserted the sticks that represent the Holy Family. I broke the sticks that represent Mama Mary and Jesus so that they would be shorter than the stick that represented St. Joseph.
 
    h. When the faces that I painted were already dry, I drew the details using a sign pen. I also glued the star on top of the stable.
 
We hanged this décor in our Christmas tree afterwards.
 
This year, I did a different Bethlehem craft with my eldest son. I asked him to paint a milk carton with brown paint so we can use it as stable for our toilet paper tube characters in our DIY Nativity set. My toddler also helped out in painting the parts of the manger for this set. Then, I took charge of making B as in Baby Jesus out of the other half of the toilet paper tube we used for the manger. I used left over yellow paper to cut out the hay for the manger.


9. Flag-making Activity - My sons made the flags of Bahrain and Bangladesh.


It has been another B as in busy week for us but it was fun-filled and blessed especially since our week was capped with the All Saints' Day party of our homeschool group where my sons came as San Lorenzo Ruiz de Manila and St. Dominic de Guzman.


My two sons as St. Dominic de Guzman and San Lorenzo Ruiz de Manila.
 
Today, we kicked off our new letter of the week - the letter C! Watch out for my post where I will summarize and enumerate our activities this week! 

Thursday, October 2, 2014

Angel Craft on The Feast of the Guardian Angels and More

It's the Feast of the Guardian Angels today! I've been looking forward to this day because I found an angel craft activity that's perfect for my plans this Christmas. I got the idea of making angels using paper plates from this site.
 
The boys wanted to read books as soon as they woke up so I read to them the creation story and Noah's ark board books that we have. These books were still aligned with our letter for the week -- the letter A. I introduced Adam to them. We also reviewed the story of Noah and the ark that he built. I used the story of creation's ending where there was an angel sent to guard the tree of knowledge in the Garden of Eden as jumping point to the feast that we are celebrating today.


The boys and I had breakfast first. Then, they said their morning prayers and the prayer to their guardian angels. It's one of the prayers that they have memorized at an early age.
 
They had some free/pretend play for around an hour. After that, I explained to them the craft activity that we will do.
 
It was a good thing that we still had left over paper plates from last year's birthday parties. I was also delighted to discover that we had silver-colored paper plates. They're perfect for the theme and color I have in mind for our Christmas decors this year!
 
Let me share how we made our angels step by step.
 
1. We folded our paper plates into half and cut them.
 
2. We formed half of the plate into cones. We stapled it first near the helm. Then, reinforced towards the upper portion of the cone with a scotch tape.


3. We traced patterns on the other half of the plate. The second half of the plate was used for the wings, head and sleeves of the angel.


4. We cut the patterns. I helped my eldest finish cutting all the pieces. We wanted to make 20 angels because we will hang them in our Christmas tree eventually.


5. After cutting the patterns, it time to assemble them. I first formed the wings and positioned the sleeves. Then, I asked my eldest son to help me staple them. We then used a tape to stick them to the cone or body of the angel.  


6. Once the wings and sleeves were in place, we taped the head on top of the cone.  
 
7. Then, we cut a piece of aluminum foil and rolled it thinly to form the halo. We used a tape to stick it to the back of the head of the angel.


I plan to add cut outs of hands and musical instruments eventually to these angels since we know that angels sing and worship God in heaven and because our family loves music. I plan to use gold-colored paper for the musical instruments.
 
I love this craft because it gave my sons an opportunity to practice a number of skills. There was folding, tracing, cutting, sticking, sorting and counting. It also taught them to be patient because there were a number of steps to be done before we can finish an angel.
 
On top of that, I got to teach through this craft to recycle and reuse old materials at home and turn them into something useful and beautiful. Instead of buying expensive angel decors, we can now decorate our Christmas tree with our very own work.

Our choir of angels.
 
Aside from making this angel craft, we also read the book Amelia's angel again. We used one of the angels that we made to tell the story.


Then, we went to Mass in the evening. My 5-year-old son sang in the choir. There were no other choir servants so he sang solo.

After the Mass, my boys' pretend play was still the Mass. My eldest son was alternating from being the priest and pianist while my younger son and our helper were the choir.
 
How did you celebrate the Feast of the Guardian Angels today? Feel free to share them in the comments.

Saturday, September 27, 2014

10 Tips on How to Raise an Author or Illustrator

I have shared in my previous post that our family attended workshops during the recent Manila International Book Fair. One of the workshops we attended was conducted by Zarah Gagatiga, a children's book author. I initially thought that the workshop was for adults but we found out on the day itself that it's for kids. Still, we were glad we went to attend it with our eldest son.

As I've mentioned in my previous post, the workshop became a one-on-one activity between the author and my eldest son because the other kids who bought copies of her books left right away. We, however, lingered even after we had our copy signed.

I think it was a blessing in disguise that I made a mistake and thought that the workshop was for adults and that the workshop became a one-on-one activity. I eventually discovered that the activity had a big impact on my son. But before I go ahead and tell you why, let me share what Yanthy and Zarah did during the workshop.

First, Zarah showed him some slides when she was younger and she showed him some picture/illustrated books as part of her presentation.


Then, she taught him the basic elements in writing a story: the beginning, middle and the end.
My 5-year-old pondering on what story he would write.

After that, she gave my boy a bond paper, a pencil and some coloring materials. She folded the paper and wrote page numbers on it. She also wrote on the 'book cover.' She explained to Yanthy that the 3 pages would be the beginning, middle and end of his story.
 
Then, she asked Yanthy what he wants his story about.

The story that Yanthy thought of that morning was about their toy dog. He shared his idea with Zarah and she in turn encouraged Yanthy to draw/illustrate his ideas. She also helped him out in illustrating his thoughts. After sketching/drawing on his 'book,' Yanthy colored it with crayons. 


Yanthy obviously enjoying the activity. Mateo looks on.
After the activity and after I found out that there is an adult version of the Children's Book Writing Workshop in the meeting room upstairs that afternoon, my husband and I decided to make time for that workshop. We went there right after the storytelling and book signing activity of another children's book that my kids like.


Zarah Gagatiga's turn to speak.

There were three (3) speakers for the workshop but we got there late so we were able to listen to only two (2) speakers. The speakers were also children's book authors. The third one was Zarah Gagatiga, children's book author, school librarian, storyteller and President of KUTING or Kuwentista ng mga Tsikiting.


The 3 speakers during the workshop.
I thought that it was only me and my husband who learned and were inspired by the workshop. The second speaker (Eugene Evasco) spoke mainly in Filipino and some or many of the words he used were too deep that my husband and I had difficulty understanding some of the materials discussed. My husband even joked days after the workshop that there should have been an English subtitle in his slides. Still, his presentation was so rich that we were very grateful that we attended the workshop. My sons kept reading the new books we bought at the fair (downstairs) during the workshop. Sometimes, they would look at the screen and the speakers. I did not think that he and his younger brother were really paying attention because the speaker was speaking in Filipino that is quite challenging to understand.


Below are some of the slides used in the workshop by the second speaker.


We went back to the book fair right after the workshop.

Yanthy's book cover.
The following day, my son got a piece of bond paper again and he had it folded in the same way that Zarah folded it for him. He also wrote page numbers on the three pages. He said that he will write a new book. I was pleasantly surprised!

I observed him and engaged him in conversation.

Since it has been raining in the past days and the news was about floods, Yanthy thought of writing a book about the rain and flood. I interviewed him about what he plans to write in his new book.

I noticed that he was working confidently on this project. I think the one-on-one workshop served him well. He was imitating the steps that they did. He also got some of our new books and looked at the front covers. He used them as his guide or reference for his book cover. He said that he wanted to be an author and at the same time illustrator like Kuya Jomike Tejido. Jomike Tejido is the children's book author and illustrator of Jepoy the Jeepney Series whom we met at the book fair. We also learned in the workshop that we attended that he has already illustrated many books. The second speaker showed some of the books he has illustrated. I discovered that Yanthy was paying attention to the presentation/talk also because of his comments while he was working on his latest book. I was also amazed that he noticed that the book authored by Zarah Gagatiga (My Daddy! My One and Only!) was also illustrated by Jomike Tejido. I missed that detail but my boy took note of that. He even reminded me and showed me the book so I would remember.

Yanthy's latest story.
  
Yanthy finished his new book and proudly showed it to me and his Dad. We took pictures of it. Then, when my mom came to visit us days later, my son proudly showed 'his books' to her, telling her that he authored and illustrated those books.

Let me now share some tips that I have learned so far from my own personal experience as an author and as mom of this aspiring author and illustrator.

1. A future author usually starts as a book lover or an avid reader. I think this is the first thing that usually happens. A child falls in love with books first and learns to appreciate the illustrations in the books that he/she reads.

2. Parents can help develop this love for books and reading in young children even at an early age by providing for them an environment where books are easily accessible. 

3. Let your child's imagination soar through pretend and unstructured play and storytelling activities. I spent a lot of time imagining and daydreaming when I was a child. I wove many stories in my spare time. I used my journals or my toys as I wove these stories. I see this happening in my child as well. He makes his own stories as he plays pretend on his own or with his younger brother. I actually enjoy listening to him as he plays and tells his stories. You'll learn a lot about how your child thinks and processes information by simply listening to his stories.


4. Make papers, pencils, crayons and other drawing and coloring materials accessible also for your kids. Let them doodle and draw to their heart's content. My son and I both grew up having writing, drawing and coloring materials available for us. I spent many hours in my childhood sketching whatever caught my fancy. My son gets to write or doodle a lot. There was even a phase when he would draw and doodle on our floors and walls.


5. Let them enjoy creating their own books. Let them make mistakes in the process. Just observe them work. Do not criticize their work. Refrain from correcting their work (grammar, spelling, punctuation, storyline, illustrations and colors of objects). Too much criticism at an early age can discourage a child to explore and try out this adventure. Let him/her work on his story first. Editing and refinement can come later. Remember that authors can always hire editors afterwards.

6. Give your child opportunities to meet authors and illustrators. Although, my son sees me work at home a lot, it also helped and inspired him to meet other authors and illustrators, especially of children's books.


With children's book author, Zara Gagatigia.
The boys with Kuya Jomike Tejido.
7. Let your child attend workshops where he/she can develop and hone his/her skill. You'll never know how a workshop or seminar would impact his future career.

8. Praise your child for trying even if his/her work is not exemplary. Offer constructive feedback gently and at the appropriate time when the child is older and ready. Don't give this too soon so as not to discourage the child. Give the child a chance to dream and have fun dreaming and pursuing his dream first. The next stage is gaining the skills necessary to fulfill his/her dream.

9. Support your child's interest by providing the materials that he requests for his book projects. 

10. Make the adventure child-led. Don't pressure your child to pursue this path. Let him take the initiative/lead in pursuing this path. Take cues from him. Although I'm an author, I do not force my son to follow in my footsteps. I let him pursue his own dreams. If he wants to do the same things that I do, it's up to him. So far, he shows interest in the kind of work that I do. He likes the same activities that I engage in. I take cues from him. If he wants to learn more and if he shows readiness, I provide whatever he needs and wants at the moment. 

Yanthy and me during my book signing activity
for Breastfeeding: A Journey Worth Taking.
Hope these tips help you and your aspiring author and illustrator!   

Friday, February 8, 2013

4 V-Day activities you can do with your kids

Here's one of my latest articles published at Philippine Online Chronicles (POC).
 
 
************
 
Valentine’s Day is not just a day for lovers. We can celebrate it by spreading love not only to our spouses; but to the other members of our family as well, like our kids. Here are four simple activities that you can do on Valentine’s Day or throughout this month of love. Choose one or choose all and make this your happiest Valentines ever with your kids.
 
 
Pre-Valentine date with my eldest son. 
Enjoying some of his favorites - spaghetti, french fries and ice cream.
Go out on a date with your child. – Who says that we can only date our spouses? This month of love, take time to plan for a special one-on-one bonding with your child to make him/her feel important and loved. If you have more than one child, plan something special for each one of them. I first heard this from bestselling author and lay preacher, Bo Sanchez. I also read about this from Stephen Covey’s book The 7 Habits of Highly Effective Families. I have practiced this since then and this is something my eldest son looks forward to each week. A lot of times, I accompany my son as he enjoys some rides then we have a donut, a pastry or ice cream after. On some days, we go to the bookstore together and find new books we can read. Think of some of your child’s favorite places and activities and take your cue from there. It can be a play date between you and your child followed by snacks afterwards. You can have strawberry ice cream or cup cakes with pink and red candy sprinkles for example. Or you can begin with a lunch date in a fancy restaurant or in his/her favorite restaurant followed by a trip to the toy store, department store or bookstore where you buy something for the child.


Pretending to be in a race car.

Yanthy tries a bike with a passenger seat at the back.
He asked if we could buy that for him and his baby brother.
 
Write love letters together. – It is already the digital age and very seldom do people write love letters by hand. But it doesn’t mean that this practice has lost its sweetness. Why not write love letters again this Valentine’s Day? Write one for your husband. Then, encourage and assist your child to write one for your spouse. Ask your child questions like “what does Daddy do that makes you happy?” or “why do you love Daddy?” to help your child come up with something to write for your husband. If you’re kid/s are still very young, you can think of a short but sweet Valentine message that your child can write for your spouse. When my son was only two years old, I assisted him in writing a Valentine message for my husband. Last year, he wrote something in his own handwriting. Your kids can also write love letters to their grandparents. I’m sure the grannies’ hearts would melt as they receive these old fashioned expressions of love from your kids.
 
 
Click here to continue reading.

Friday, November 23, 2012

Behind the Scenes of Mateo's Farm-themed First Birthday Party

My baby turned one year old last Monday, November 19, but we had his farm-themed birthday party last Sunday (November 18) so that most of our guests would be able to come.  I've been planning his party in the past months. In fact, I've been brainstorming on possible themes since he was six months old. Then, when he was around seven months old, my husband and I finally decided on the theme - farm or barnyard.  At first my husband wanted Happy Feet to be his party theme because Mateo liked to dance every time he hears music being played.  I liked it, too.  But I noticed that Mateo enjoys reading books about the farm and listening to the sound that farm animals make as well.  I also felt that planning a farm-themed party is easier; thus, I convinced my husband to choose the farm theme instead. ;-)


Venue
 
Shakey's Pizza, El Pueblo Branch
I started scouting for potential venues as soon as we finalized the party theme.  You may click here to read my previous post/article on what farm-themed party venues we considered.  I checked and considered more venues aside from those I mentioned in my previous article. The restaurants that have farm-themed kiddie parties are very few; so, I also checked other restaurants with a native or homey feel and look. Among them were Cabalen, Barrio Fiesta, Mang Inasal and Shakey's. I checked out Shakey's because I learned before (when I was still planning for my eldest son's first birthday party) that they had a country-themed kiddie party.  I found out a few months ago however that they no longer have that theme.  Good thing that they still allow a farm-themed kiddie party. I checked the rates for the food packages and computed the other party-related costs (i.e. cake, photo and video coverage, decors, party favors, etc.).  I was working on a tight budget because my husband challenged me to work within the same budget we had when our eldest had his first birthday party. And that was four years ago! It was already challenging then.  (Click here if you want to read how I planned my eldest son's Jungle-themed first birthday party.) Therefore, it was extra challenging now.  Well, I took the challenge since I understand that we have a bigger priority now (like spending wisely so we can move asap to our new house).  I reminded myself as well that the important thing is that we get to celebrate our second child's first birthday in a fun and memorable way.  Thus, my battlecry as I planned and prepared for Mateo's first birthday party was to keep it simple without sacrificing quality or what I considered essentials or must-haves like good food, nice cake, simple but nice farm-themed decor, farm-related give aways and program/games, photo and video coverage, etc. I think that our chosen theme - farm/barnyard - fits the criteria of simplicity very well.  We also planned for an intimate party, limiting our guests to immediate family members, close relatives, ninongs and ninangs (godparents) and their families, and a few close friends with small kids like us.  We targetted 50 to 60 guests.  We also chose the 2 to 4 pm time slot so that it will just be merienda/snack instead of dinner.  Shakey's Monster Meal Deal and their minimum requirement (P10,000 consumable for use of venue if you will not get any of their in-house party theme) for a kiddie party helped me stay within our budget.  I just ordered additional chocolate ice creams from them for the dessert.  The next step was to choose the best/right Shakey's branch for our party.
 
Eating time!
I read a number of reviews from various forums and decided to check out the Shakey's branch at El Pueblo at Julia Vargas avenue in Ortigas.  I liked their location because of its accessibility, especially since our guests are coming from the East, North and South.  Another thing that I liked about this branch is that they have a tv monitor that can be hooked to a laptop and used to show an audio visual presentation (avp) about Mateo during the party. That saved us a few thousand pesos for we need not pay for a (lcd) projector.  On top of that, they only required P2,000 reservation fee to reserve our chosen date.

  
Decors and Party Favors
 
I wanted to go the DIY route initially for all the decors.  I was planning to make the backdrop and centerpieces myself.  I even considered buying generic balloons and inflate them at the venue using my friend's pump.  But I got busy with a number of projects (writing/book and human resource projects) in the past months so my husband suggested that we just have a tarpaulin with a farm design printed.  I also realized that there is much to be prepared and done even on the day of the party since we did not get a party planner to help us.  It was a big blessing that Shakey's referred one of their balloon supppliers to me and I found out that they also print tarpaulins. I just gave them a farm photo/image that I liked, a photo of Mateo pretending to be a farmer harvesting vegetables, and showed them how I want the the photos put together.  I ordered 50 balloons from them (that is their minimum order). We chose four colors - red, blue, white and yellow. Shakey's assured me that they will assign some of their staff to help out in putting up the decors and setting up the place.

Our birthday boy with the cake and loot bags table and backdrop behind him.
  
So, I hunted for a ready-made birthday banner. Good thing I found a farm-themed birthday banner at a Japan Surplus store in a mall near our place.  It was also in the same store that I bought the farm-themed paper plates, cups, party hats, plastic loot bags, and invitations. I also bought a "birthday boy" ribbon there for Mateo to wear on the day of his party. I was very happy that I found what I was looking for and that they fit my budget. :)


The farm-themed paper plates, cups and party hats we used
lined up near the crafts table and registration table.
 
 
I used farm-themed plastic toys as part of the decor. Some of them anyway were also prizes and props for the games. I also used real mangoes as prize for one of the games.
 
Later on, I realized Shakey's was indeed perfect for our farm-themed party because I was able to borrow baskets from them where I placed the game prizes.


Then, we brought my eldest son's cow seat (a gift to him during his first birthday) as well. It was used by Mateo as his seat and doubled as decor. 

Mateo on his big brother's cow seat.
 
Since red is one of our party colors, I thought of using red apples for our table centerpieces. Then, to further reinforce the farm theme, I made farm animal cut outs with barbeque sticks and stuck them to the red apples. 

One of our centerpieces, cow cut-out stuck to a bbq stick and red apple.
These centerpieces were connected to the registration process of our guests. At the registration table, each family/guest is to pick a small piece of paper with a farm animal's sound printed on it. That will help them find their table.

For example, a family got a piece of paper with the word quack printed on it. That means, they will be seated at the table with a duck centerpiece. They will also receive a duck coloring page that their family will color and use to write their greetings for our birthday boy.  I've decided to print various farm coloring pages for the different farm animals we used as centerpieces.  We actually had 12 tables and we used 6 kinds of animals (duck, cow, pig, rooster, horse, sheep).  

Here is the link to one of the websites where I got some of the coloring pages we used.


The guests from the horse table with their matching horse coloring page/greeting page.

 
My mom and I made 2 sets of animal cut outs for the centerpieces.  I got this inspiration from some of the blogs I read as I searched the internet for ideas for a farm-themed birthday party. Click here, here and here to see some of them.
 
 
I wanted to design and make my own party invitations but I was pressed for time and I realized that I will most likely send email invites to our guests so I decided to simply personalize our farm-themed store-bought invite a bit. Then, I emailed it to our guests. Here's how it looked.


Originally, I was thinking of using smaller versions of farm animal cut outs for the kids' name tags but I realized that cutting these shapes took much of our time so I asked my husband to print rectangular name tags instead on sticker paper with some gingham design. Then, we can just write the names of the kids using pentel pen when they arrive at the registration table.
 
 
Next, I mindstormed on potential give-aways and loot bag fillers. Since, our family loved books including Mateo, I decided to give a farm book to each kid in the party. Some of the farm books we gave away were the farm-related stories from the Phonics-in-Reading Series.  You may click here to read my review of this fantastic books. 

The others were board books of farm-related nursery rhymes and about tractors. 


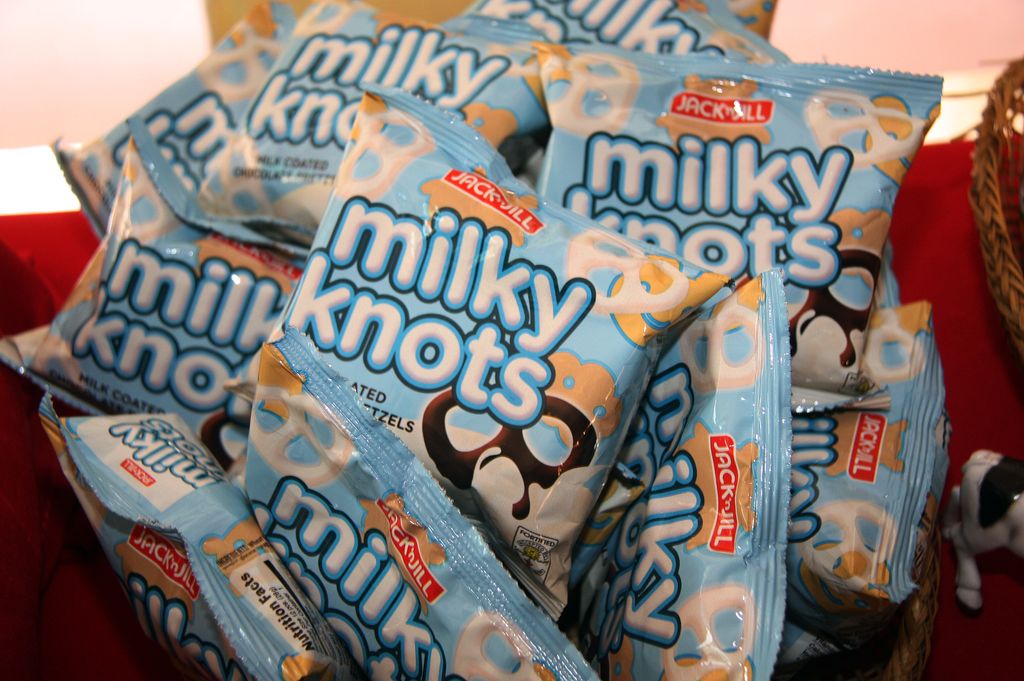
I also looked for food products that suited our farm theme and our budget for loot bags. :)  Here's what I ended up buying for the give-aways: Moo chocolate drink, Milky Knots pretsels, fruit flavored jellies, Milkita lollipops, Fruitees mango-flavored cookies and marshmallows.   


Cake, cup cakes and mini cupcakes
 
The cake is usually the centerpiece  or main decor in a kiddie party so I invested time looking at pictures of various cakes in the internet of nice farm-themed cakes.  I found lots of beautiful cakes! Then, I took note of what I wanted to see in Mateo's birthday cake based on my concept for his party. Then, I communicated these to my friend, Lala, (who happens to be my eldest son's godmother or ninang) who is making the cake for Mateo's party. First, there has to be a red barn, some fences, a number one candle, some farm animals and some vegetables.  I specified what animals I wanted to see on the cake as well as the cup cakes.  I told her that the same farm animals used as table centerpieces should be in the cupcakes.   I asked her to make 12 cup cakes with farm animal faces and 20 mini cup cakes that look like a vegetable garden.  Take a look at her wonderful creations! (You may click her name to contact her if you're interested to get her for your cake and cup cake needs.)


Mateo's farm-inspired first birthday cake.


Mateo's farm animal cup cakes.
Mateo's vegetable garden mini cup cakes.

She's a big blessing to us because not only did she give me a discount on the cakes, cup cakes and mini cupcakes, she also helped me set up the cake and loot bags table on the day of the party while I was busy setting up the other tables like the craft table and registration table.
 
 
Program and Prizes
 
 
We planned for a simple program since we were only given two hours for the use of the party venue.  We did not get a host or entertainer anymore. Just like in my eldest son's first birthday party and previous birthday parties, I acted as host and game facilitator. :) My husband and eldest son, Yanthy, provided the entertainment. :)
 
After the registration where the guests finds out their table assignment, get their coloring pages which will eventually become part of Mateo's scrapbook and guest book, and kids get their nametags, the kids and parents can make some crafts while waiting for the other guests and the games to start.


That's me giving out a name tag at the registration table.
 
Yanthy making a cow balloon.
I prepared the materials in a table and printed an instruction sheet. With some help from my eldest son and our reliable maid, we taught the kids and their parents how to make cow and pig balloons. This was one of our previous homeschool activities and I thought that it's appropriate for Mateo's farm-themed party.  You may click here to see how to make this craft. One thing we did differently during Mateo's party was to use googley eyes instead of simply drawing eyes on the balloons using pentel pens.

You may also print farm-themed mazes for kids to answer while waiting for more guests to arrive. Here are two mazes I found that you might want to use -- cow maze and duck maze.

 
I planned for four games but we only had three games during the actual party due to time constraints.

 
The first game was to help Farmer Mateo gather his farm animals back to his red barn. I made two red barns from red cartolina for this game and put some strips of bond paper for the white doors and outline.  I printed pictures of the same farm animals we had for our table centerpieces in smaller versions. With the help of one of Shakey's staff, we stuck them on the walls, balloons, tables and chairs in the party venue using masking tape. 


During the game, the kids were instructed to find these animals and stick them to the red barn given to their group.  The kids were grouped according to gender during the party - boys versus girls. :) They were told that the group who can gather the most number of farm animals in their red barn wins the game. The kids had fun looking for the farm animals! Even their parents helped search for Mateo's farm animals to help their kids. ;-)  The girls won the game. They were given plastic animals as prizes and egg-shaped chocolates. The boys got Egg Bites milk cookies as consolation prize.


The second game was Mateo Went to the Farm. We had the same groupings to save on time. I told the kids that Farmer Mateo needs their help in harvesting his fruits and vegetables and that they need to get as many as they can but they need to put on some things. I asked the kids to line up again while my husband put some chairs where they can go around.  Before the party started, I already set up the plastic toys (fruits and vegetables) in the cover of our native basket/hamper, the red and blue bandanas and the two plastic baskets for the two teams. Actually, some of the kids started playing with the plastic toy fruits and vegetables even before we had the program. :) 


The kids went to the farm with their farmer hats, bandana and baskets.

Farmer Yanthy
helping Mateo harvest.
I explained to the kids that they need to first wear a native hat, tie a bandana around their neck and hold their plastic basket before going around the chairs, pick up or harvest some fruits and veggies in front before going back to their line and passing their props to the next kid in their group.  I asked one parent per group to help the kids out.  The kids and parents had a blast once more! :) This time, the boys won.  They got real ripe mangoes for their prize while the girls got mango-flavored cookies as consolation prize.

The girls counting the fruits and vegetables they
harvested from Mateo's farm.

 
Prizes for game Mateo Went to the Farm.
The third game was basically Moo-sical chairs or I called it Mateo's animal sounds barn dance. It's like the game Trip to Jerusalem with a lot of twists since it's a farm/baryard party. The first twist is that  the game will be played by  kid and parent pairs.  The second twist is that the kids will sit on their parent's lap when the music stops. The third twist is that there are enough chairs for the participants.  The chairs used in the game had strips of paper with animal sounds on them. To determine which pair will be eliminated from the game, I or my eldest son picked a piece of paper with animal sounds from an envelop.  The pair sitting on the chair with the same animal sound as in the piece of paper we picked will be eliminated.  This goes on until there's only one kid and parent pair left.  The last twist is that we used barn dance music and the kids and parents who joined the game will have to dance the heel and toe polka or barn dance while going around the chairs. Since not everyone are familiar with the barn dance steps, I demonstrated or taught them how. My eldest son helped me by being my partner.

Barndance: heel and toe polka with my eldest son as my partner.

My husband operated the laptop and the sound system.  Here's the link to the barn dance music we used.  The dance is very easy and even our birthday boy learned it days before his party.  The winning pair was Daddy Joel and Zia.  Zia got a small piggy bank and Daddy Joel got a nursery rhyme book.  Consolation prizes were given to the rest of the players.

The winning pair for the moo-sical chairs game.
The next part of the program was a farm song led by my husband, George, and my eldest son, Yanthy.  They modified the song Old MacDonald a bit and changed it to O Mateo had a farm... My husband prepared a Power Point presentation for the modified lyrics which I showed while he and our son sang and played their guitars in front.  Yanthy sang his heart out to the delight of our guests. :)
 
Then, they led in singing the birthday song for Mateo before the traditional blowing of candle on cake. This was followed by merienda/eating time.  The kids were served by the Shakey's staff while the adults and older kids lined up at the buffet table at the back.


My husband and our eldest son leading the song O Mateo had a Farm.
 
Yanthy during his special song
number for Mateo.
While our guests were enjoying their food, the avp made by my brother-in-law Bobby (the man behind Irax Videography) for Mateo was shown.  It was a very nice audio visual presentation!  He also made the avp for our eldest son's first birthday party four years ago.  You may contact him here if you are interested to get his services.
 
The kids had some unstructured play while the the adults were eating before my eldest son remembered that he prepared a special song number for his baby brother. :)  He actually modified the song This Little Piggy months ago into This Little Baby and he loved singing it to his baby brother at home. He also volunteered to sing it at Mateo's birthday party, which he did but sang only half of it during the party because he saw that ice cream was already being served.
 
 
We planned for another game called Farm Genio (suggested by my good friend Raquel and one of Mateo's godparents) supposedly for couples; but there was no more time and one of Shakeys staff already reminded me that our two hours is almost finished. Anyway, it's similar to the Pinoy Genio game popularized by a local noontime tv show except that the words to be guessed are all about things that one sees in the farm. I'm sure our guests would love that game too if we still had time to play it.
 
As soon as I finished most of my food, I started calling on some of our guests per table to join us in front for some picture-taking with the birthday boy. After our picture per family was taken, I gave the kids their loot bags and give aways and thank their family for coming to Mateo's party.
 
 
Photo and Video Coverage
 
One of my essentials for Mateo's first birthday party was to get the services of a professional photographer and videographer to capture this memorable and once in a lifetime event. Thankfully, I found the perfect provider through one of the articles posted at Smart Parenting Online.  I got the P5,000 photo and video package of JV All Events then my husband and I bought a group deal voucher for the photo album. 
 
 
Costumes and Birthday Outfit
 
Farmer Mateo, the birthday boy.
To match our farm theme, we encouraged our guests to dress in plaids and denims.  We dressed in denims and plaid polos as well.  We found the perfect outfit for our birthday boy at SM department store one evening.  We bought him two plaid polo shirts - one from Grizzly and another from Crib Couture.  We found the perfect denim pants for him from Snoopy and the matching blue baby shoes from Elle, all from SM Department store. It was one blessed day for our very busy family because we found all the things we were looking for in one store.  That saved us a lot of time.


Clap, clap, clap!
I bought my plaid polo shirt from the department store of a nearby mall (Walter Mart) two days before the party.  My husband found and bought his plaid polo shirt from SM Department store as well.
 
I asked our maid to buy the red and blue bandanas and farm/straw hats from Baclaran.
 
The days, weeks and months leading to Mateo's first birthday party were very busy days for our family, especially me. It was stressful and tiring but all these were eventaully replaced with joy and thanksgiving as soon as I saw the fruits of our labor and the happy faces of our guests and of Mateo of course. 


I praise and thank God for the abundance of grace He has poured on me and my family members which enabled us to organize Mateo's party. I thank God for the angels He sent our way like my mom, my brother-in-law Bobby, my friends Lala and Raquel (who gave me many helpful suggestions for the party) and all our party suppliers (Dona of Dona's Balloons, Jun of JV All Events, and Shakey's).  My husband and I were so happy that we were able to have a fun and memorable first birthday celebration for Mateo and stick to our budget. :) Truly, with God on our side and with a lot of creativity and resourcefulness, nothing is impossible!
 
 
Happy 1st Birthday, Mateo!